Creating Your First AI Story
This guide walks you through creating a story on the Board and watching the AI agent analyze, implement, and deliver working code as pull requests.
Prerequisites
Before you begin, make sure you have:
- Connected a VCS provider (GitHub, GitLab, or Bitbucket) and selected at least one execution repository
- Configured your Anthropic API key in Settings → General (required for AI execution)
Step 1: Create a Story
- Open the Board from the left sidebar
- Click the Add Task button in the toolbar
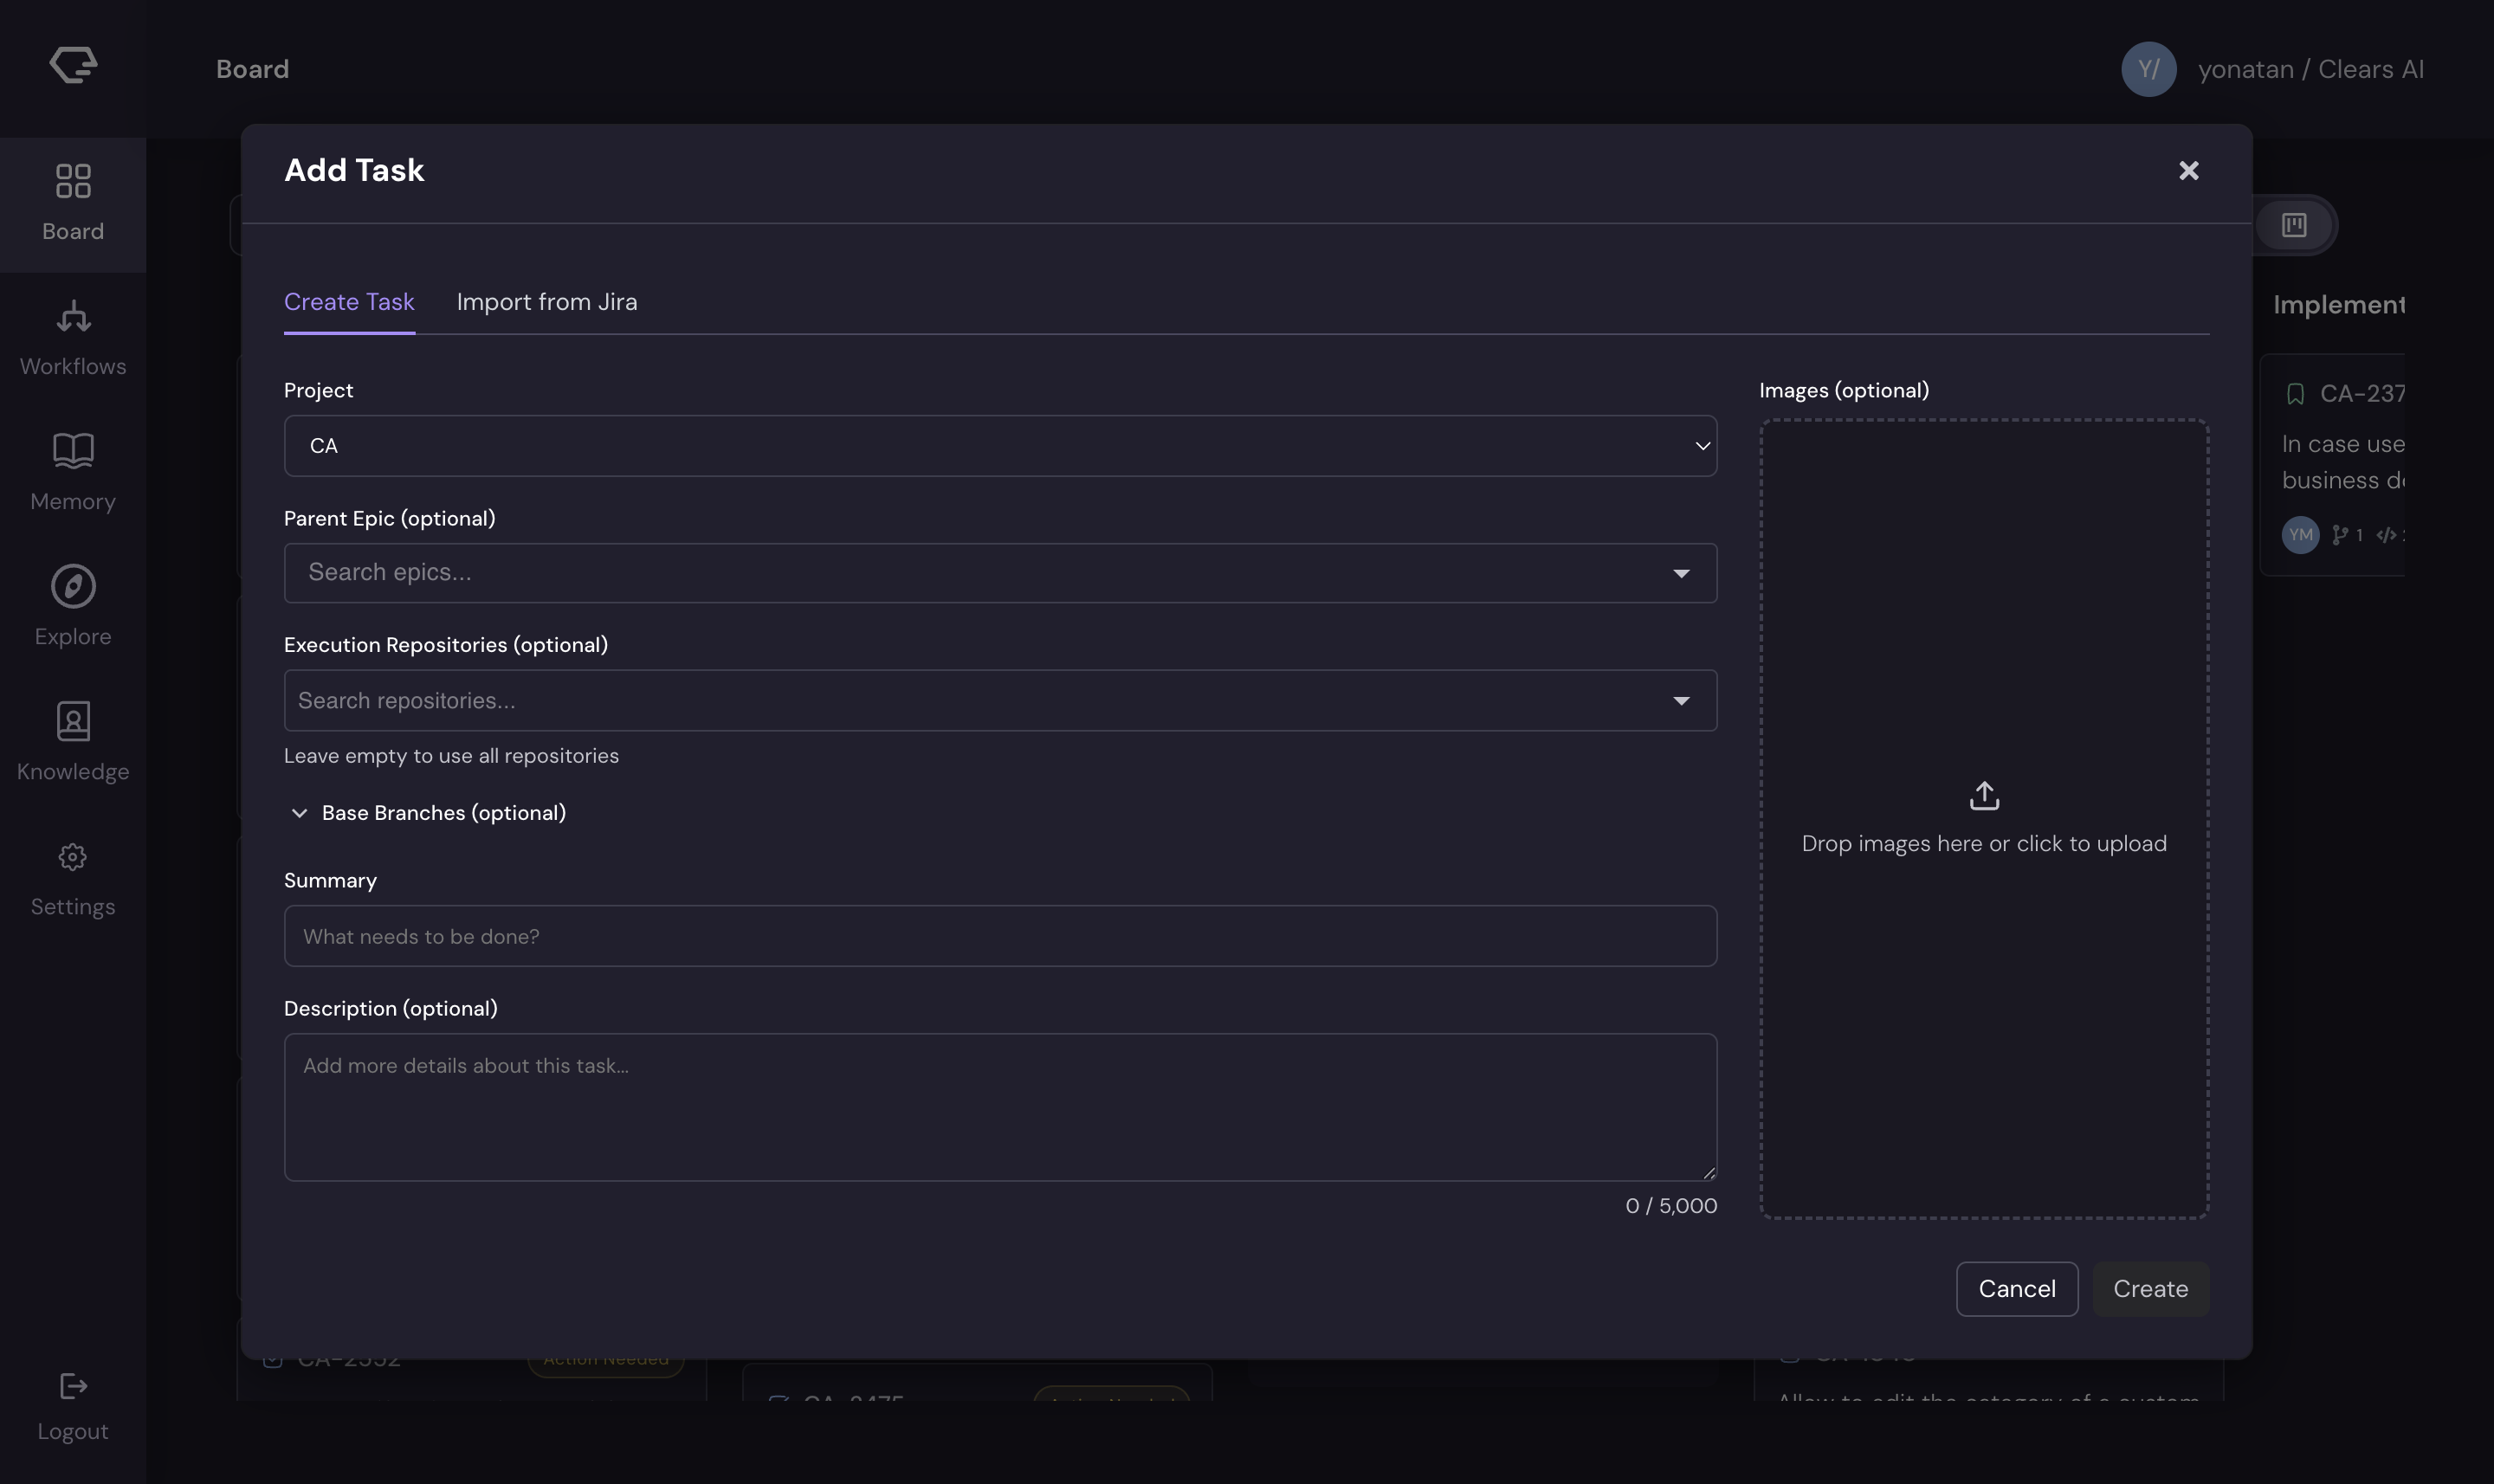
- Fill in the story details:
- Summary (required) - a clear, concise title for what you want built
- Description (optional) - additional context, requirements, or acceptance criteria
- Project - select the project (if you have multiple)
- Parent Epic (optional) - link to an existing epic
- Execution Repositories - choose which repos the AI should work in
- Images - drag and drop screenshots, mockups, or diagrams to provide visual context
- Click Run Task
:::tip Writing effective stories The more context you provide, the better the AI performs. Include:
- What the feature should do (user-facing behavior)
- Where it fits in the existing codebase (if you know)
- Any constraints or edge cases to handle
- Screenshots or mockups for UI work :::
Step 2: Watch the Analysis Phase
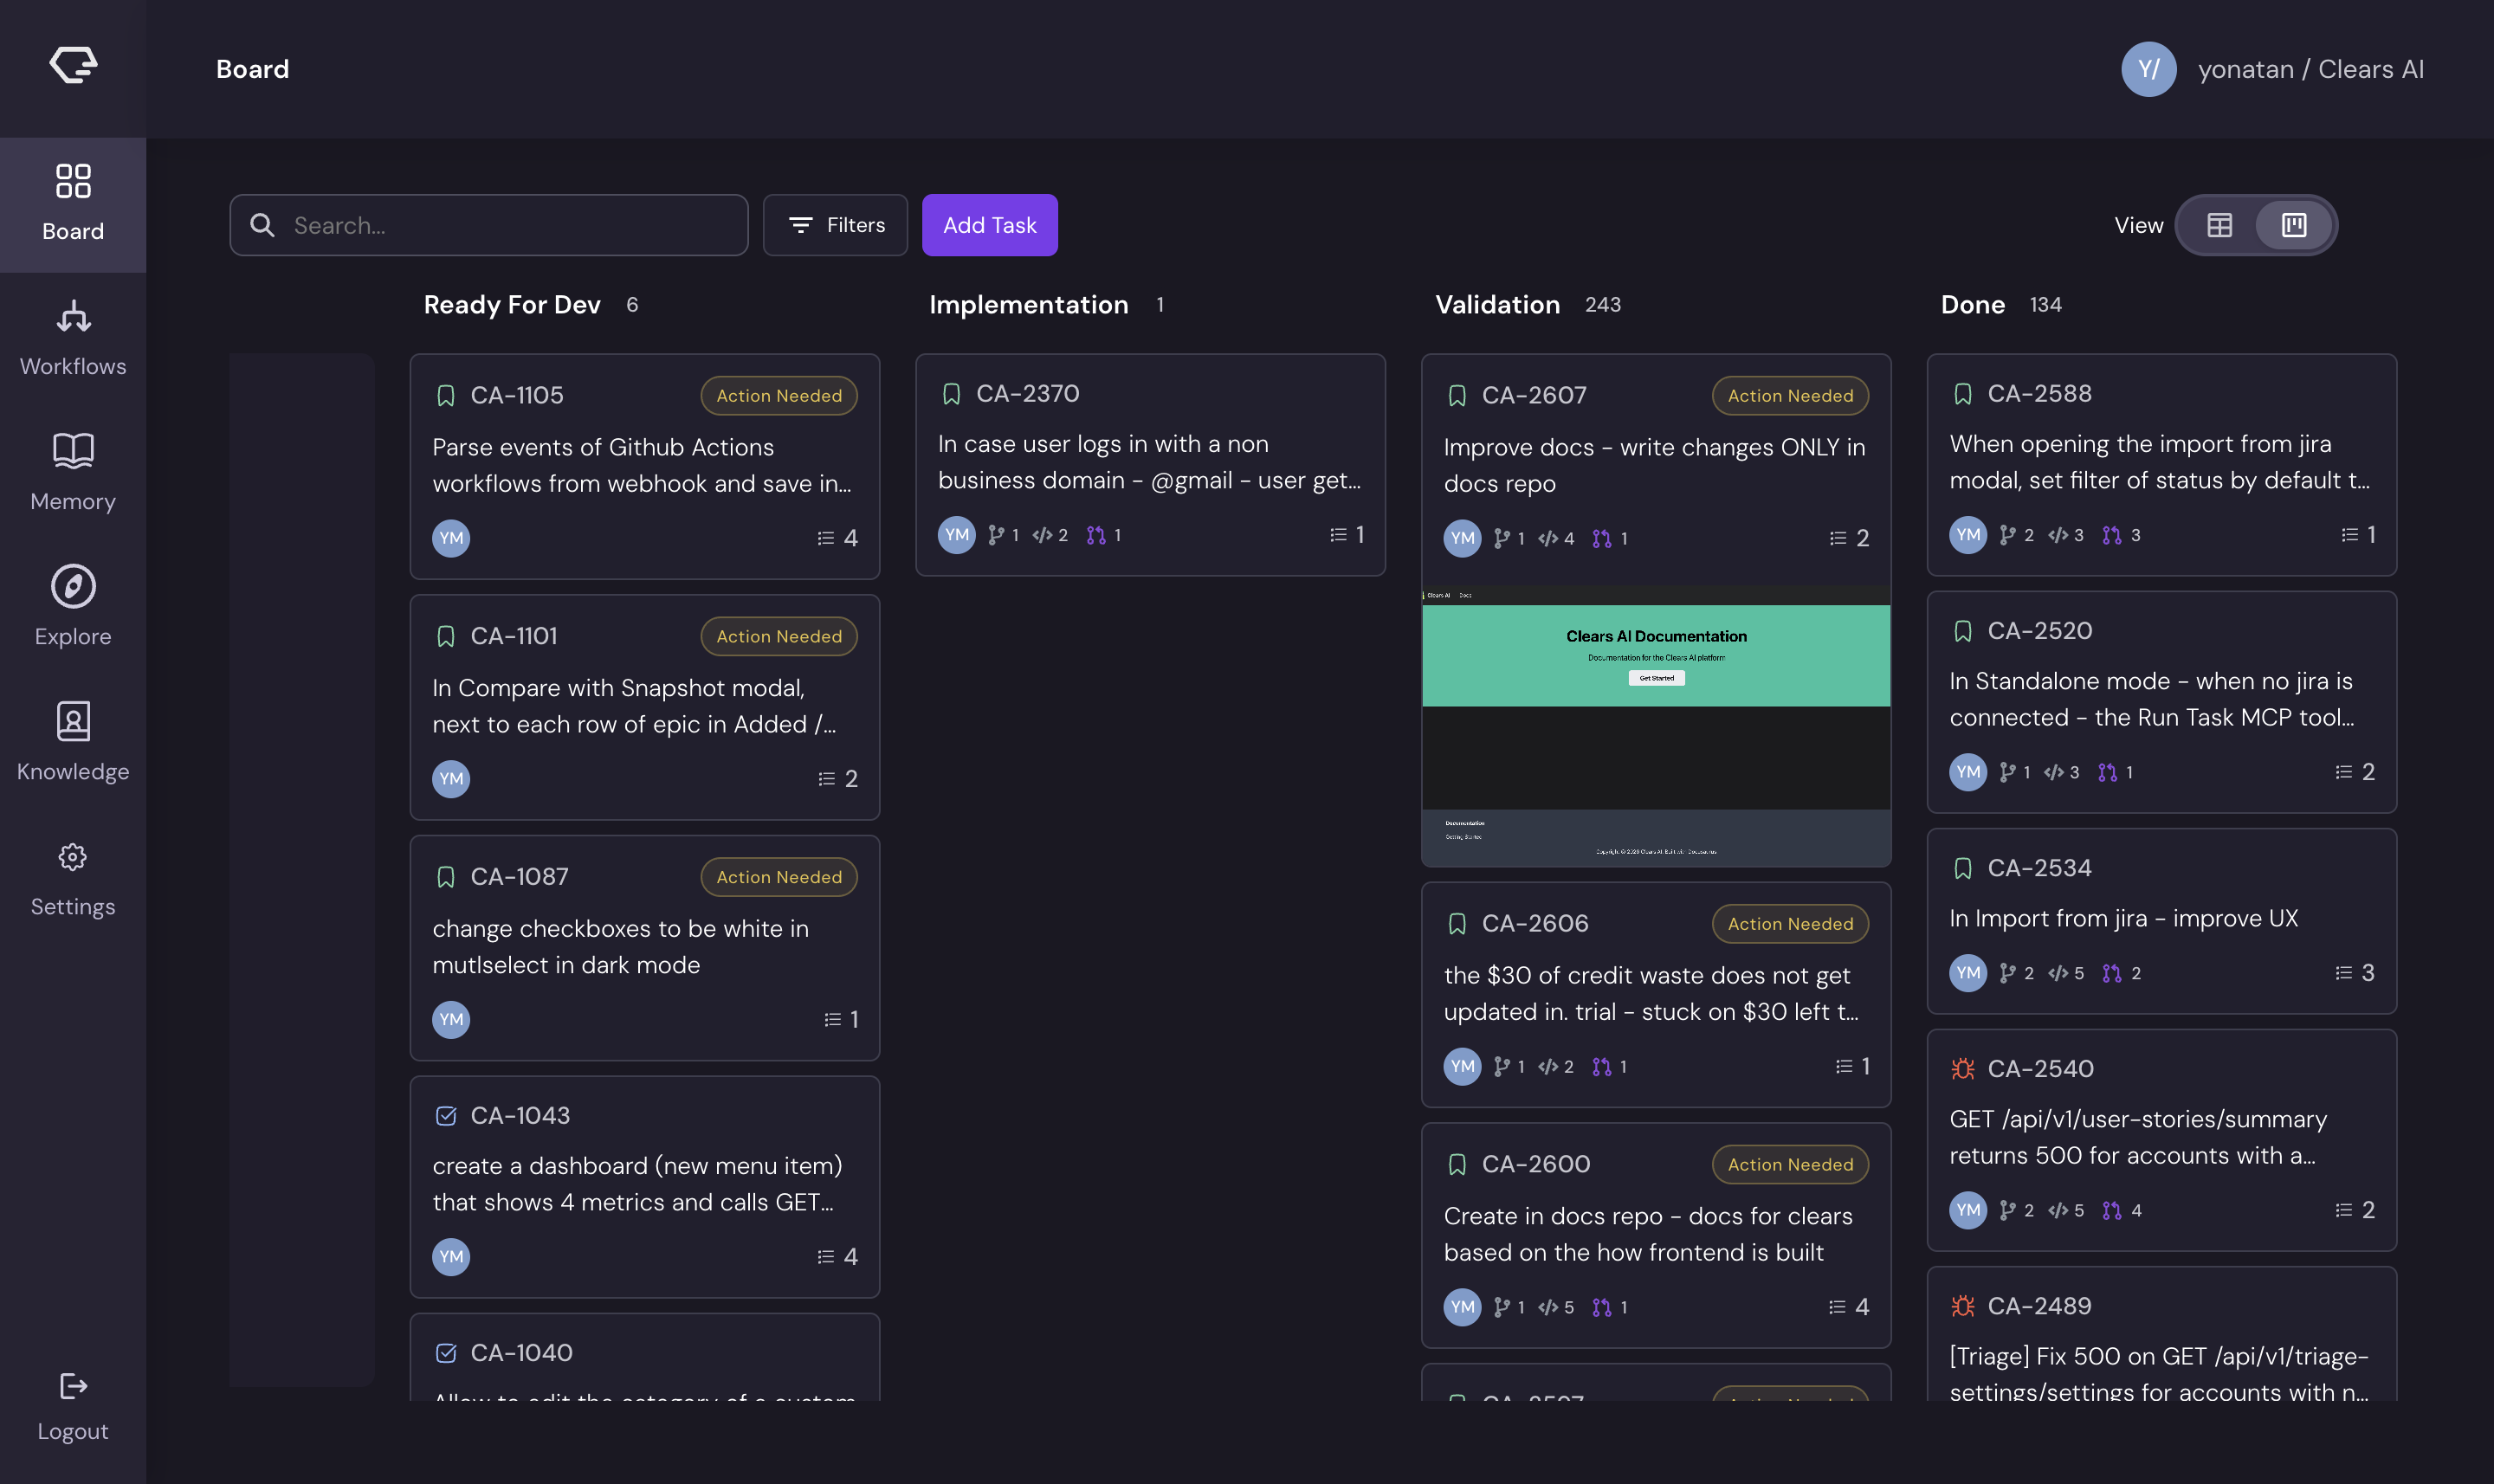
After creating the story, it appears in the To Do column and the AI agent begins its work:
- Codebase exploration - the agent reads your repository to understand the architecture, patterns, and conventions
- Specification generation - the agent writes a detailed spec including a TL;DR, description, definition of done, and files to change
- Status update - the story moves to Enriched status when analysis is complete
Click on the story card to open the detail panel and watch progress in the AI Session tab.
Step 3: Answer Clarifying Questions
During analysis, the AI may generate clarifying questions about your requirements. These appear in the Q&A tab of the story detail panel.
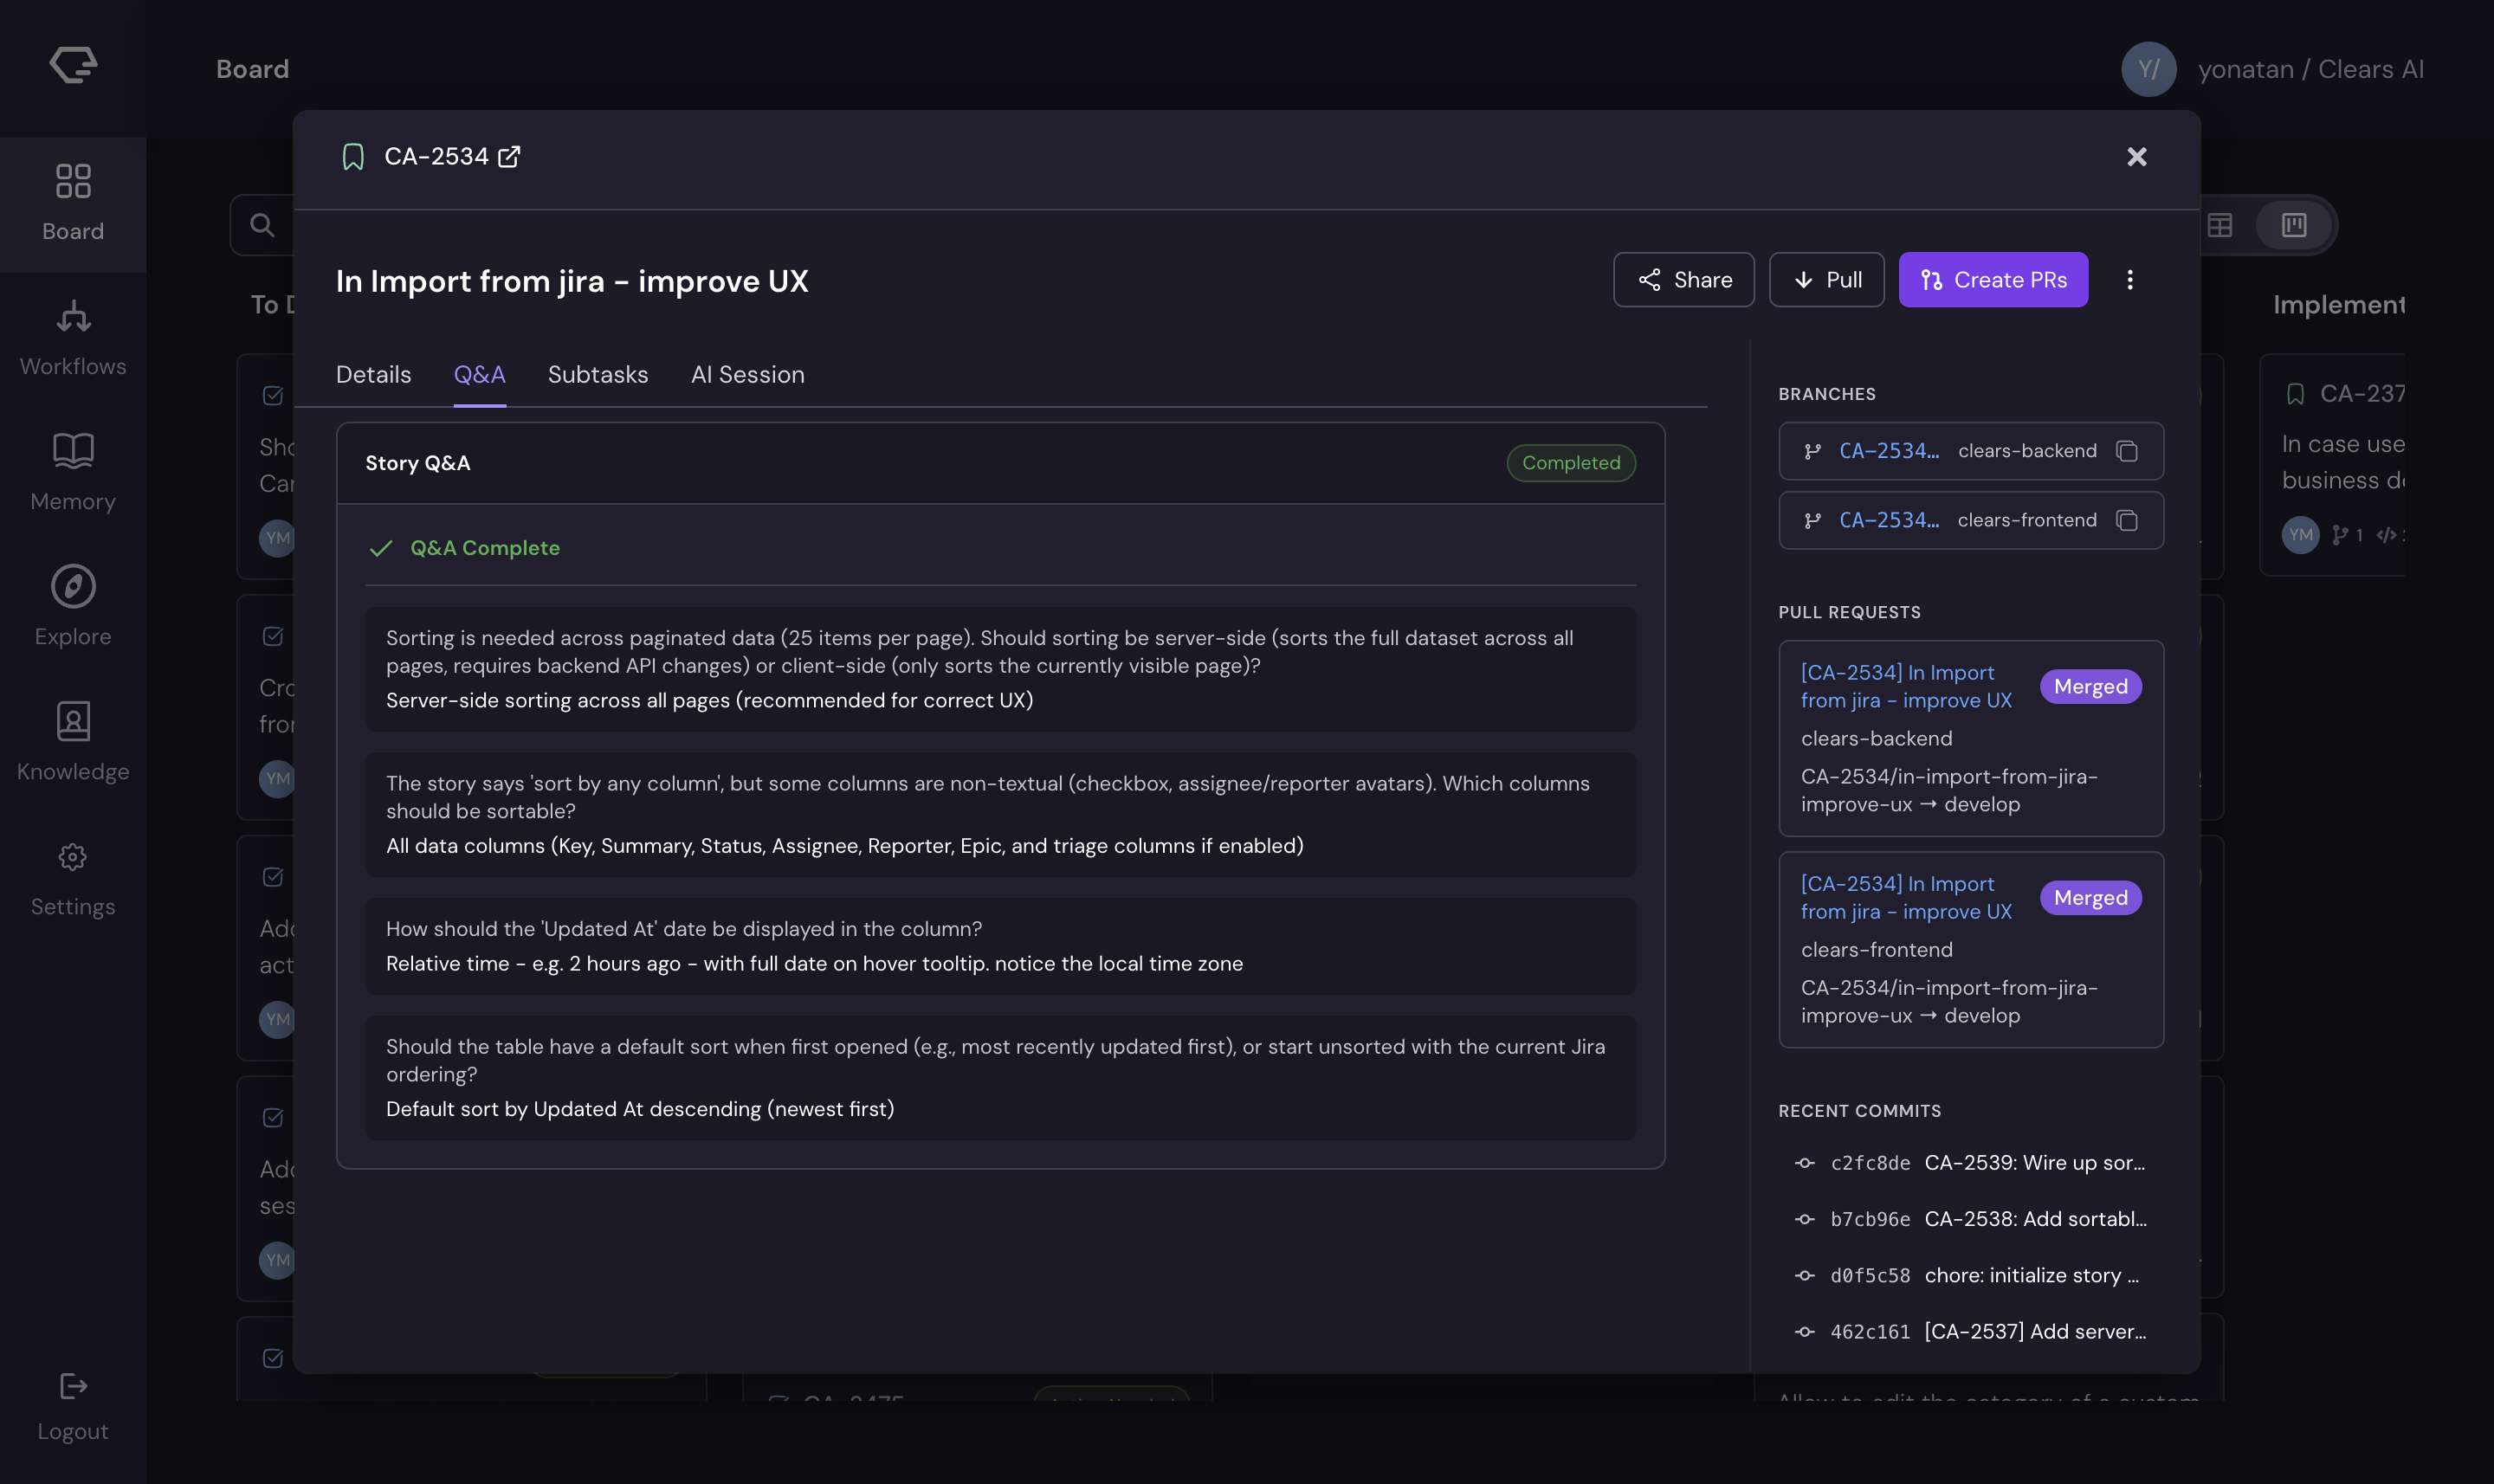
- Open the story detail by clicking the card
- Navigate to the Q&A tab
- For each question:
- Select one of the suggested options, or
- Type a custom answer in the text field
- The agent uses your answers to refine the specification
If Slack is connected, you'll also receive Q&A questions as direct messages and can respond there.
Step 4: Review the Specification
Once the story reaches Enriched status, review the generated specification:
- Open the story detail panel
- Check the Details tab for:
- TL;DR - a brief overview of the planned changes
- Description - detailed technical approach
- Definition of Done - acceptance criteria the implementation will satisfy
- Files to Change - which files the AI plans to modify
The description and summary are editable - update them if the AI's interpretation needs adjustment.
Step 5: Monitor Implementation
After the specification is approved, the AI decomposes the story into subtasks and begins implementing each one:
- The story moves through Ready For Dev → In Progress status
- Each subtask gets its own branch and commits
- Watch progress in the AI Session tab - it shows a live terminal view of the agent's actions
- Use the AI Session to send prompts, attach images, or redirect the agent while it works
- VCS activity indicators on the card show branch, commit, and PR counts in real time
Activity indicators work with all supported VCS providers. If you're using GitLab, "pull requests" appear as "merge requests" in the GitLab UI, but the Board badges track them the same way.
Step 6: Review Pull Requests
When implementation is complete, the story moves to Validation status and pull requests are ready for review:
- Check the VCS activity on the story card — PR badges show open PRs
- Hover over a PR badge to see the PR title, number, and status
- Click through to review the PR on your VCS provider
- Review the code, leave comments, and merge when satisfied
Requesting Fixes
If you find issues in a PR, you can request a fix directly from Clears AI:
- Open the story detail panel
- Use the Request Fix option to describe what needs to change
- The AI agent reads your feedback and pushes updated commits
What Happens Next
Once all PRs are merged, the story moves to Done status. The AI captures learnings from this execution into the memory system, improving its performance on future stories in the same repository.
Quick Reference: Story Lifecycle
| Stage | Status | What's Happening |
|---|---|---|
| Created | To Do | Story created, AI begins analysis |
| Analysis | To Do → Enriched | Agent explores code, generates spec, asks Q&A |
| Approval | Enriched | Review the generated specification |
| Implementation | Ready For Dev → In Progress | AI creates subtasks and writes code |
| Validation | Validation | PRs ready for review |
| Complete | Done | PRs merged, learnings captured |
Next Steps
Now that you've created your first story, explore:
- Core Concepts to understand the full execution pipeline
- Board features for advanced filtering, views, and agent interaction
- Memory to see how the AI learns from your codebase